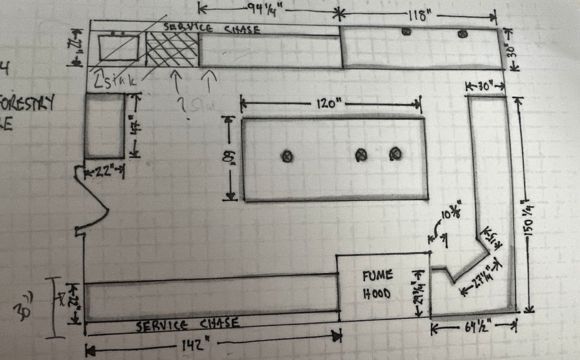
Measure the room and make a rough drawing
Your lab project starts with an understanding of all room dimensions and details. We can help refine the rough initial details gathered and create an accurate drawing of the space. Pictures of the lab space can help communicate with the project team and keep a record of activity.
Steps
- Measure all walls and confirm the ceiling height
- Confirm the sizes and positions of all doors and windows. For the windows it's important to note their height off the floor
- Measure and mark all:
- Columns
- Floor drains
- Utility connections on the wall or floor
- Other obstructions within the room

Remember, layers of information will need to be gathered on any project. A member of our CAD team can quickly take a hand sketch and create a scaled drawing for further comment or action.
Lab Measurement Drawing After Final Planning by RA Lab Technologies. This initial drawing can now be the basis for planning and further communication. Lab furniture, equipment, electrical, plumbing among other elements can be positioned within the drawing and reviewed by the project team and one of our Furniture Specialists.